
You may find that you need items added to an invoice that don’t fall under products, especially when it comes to calculations and quantities.
The Additional Charges system allows you to add these items and have them displayed separately without adding to container quantity counts but still adding to the total invoice (whether positive values, like adding a few cents for rounding purposes, or negative values such as a rebate).
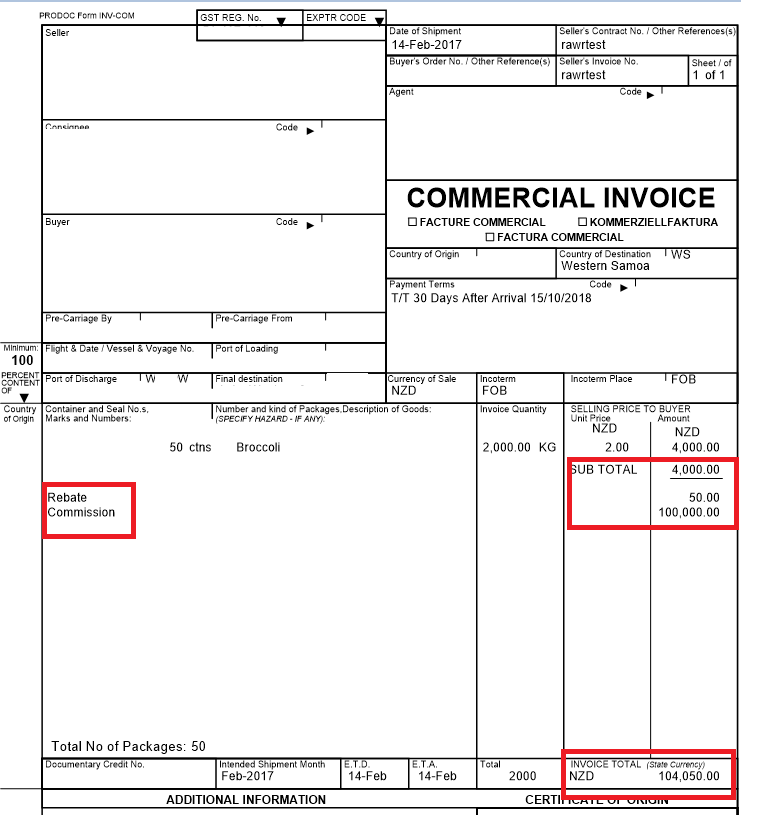
This can give a result that looks like this (although being a customisable system, this is malleable to your needs):
When used correctly, there are no disadvantages to this method over adding these items as products, and these can be imported from your ERP system alongside product data if you are using an interface (standard charges apply to implement this).
Advantages include:
- Separation of product and non-product data
- Automated calculation against a shipment based on a wide range of criteria
- Can be used for both customer and supplier invoicing (with charges applied to specific supplier invoices where multiple suppliers are in use)
- Does not count item quantity in total quantity and container quantity counts (your rebate has a quantity of 1, but your container does not have an extra item in it)
- Generation of subtotals, further separating products and additional charges
Using Additional Charges
Method A
There’s two primary methods to apply Additional Charges, one method that is eternally present on the Details screen for all shipments as pictured below:
Assuming your forms are configured to display Additional Charges (standard charges apply to add this functionality to a form, contact us to add this to a form) then these will show up as pictured earlier.
Using this space will allow you to add up to three additional charges, if you require more than this, require them to automatically apply or calculation or want to select charges from a drop down, you’ll need to use the secondary method below.
Method B
To utilise the more advanced additional charges system, you simply need to add your first charge and restart Prodoc. The existence of a charge will activate the advanced system (and removing all charges will deactivate it on next start).
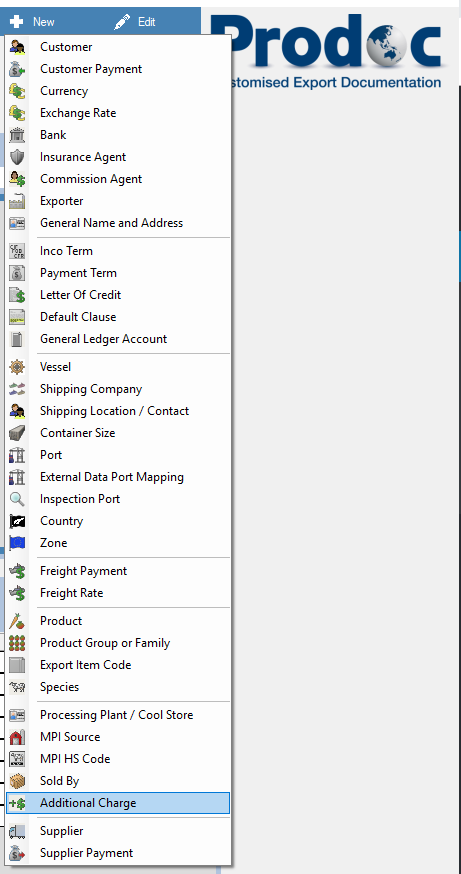
To add a charge, simply use the Additional Charge item on Prodoc Home > New:
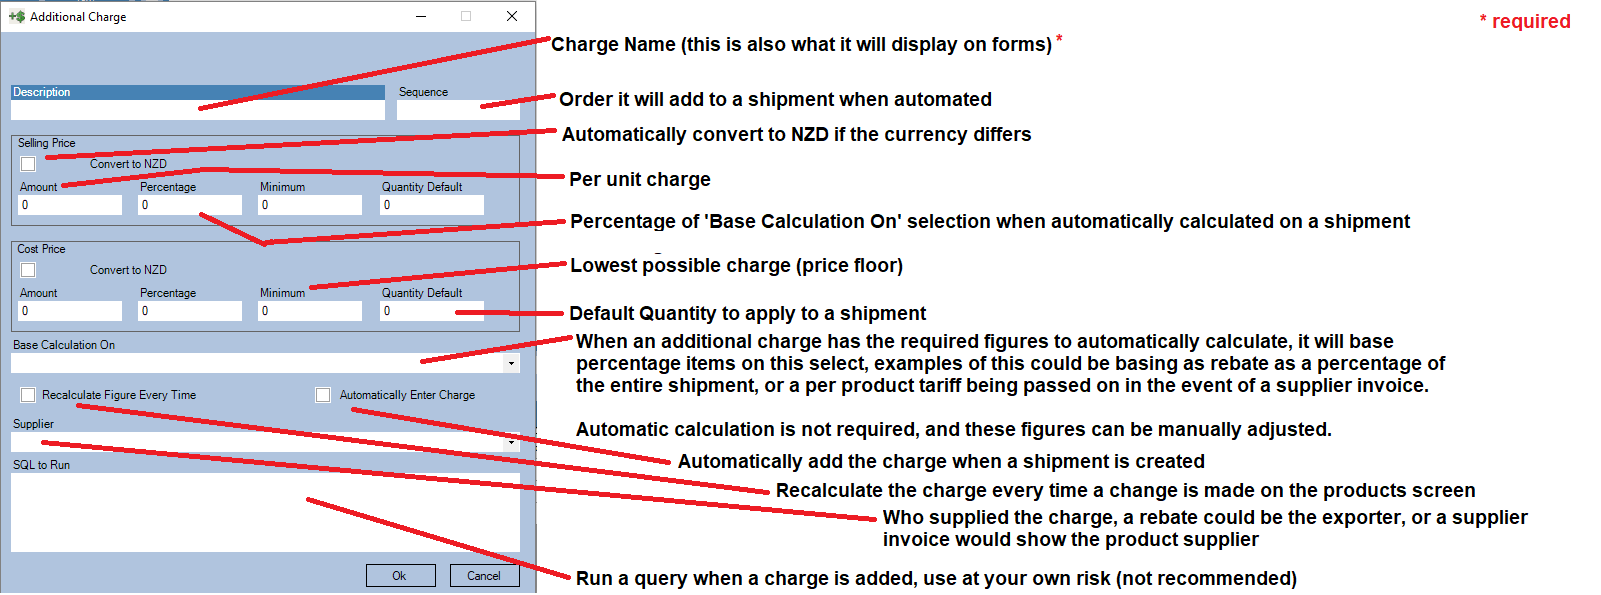
Which will pop the following box:
Restart Prodoc if this is your first charge.
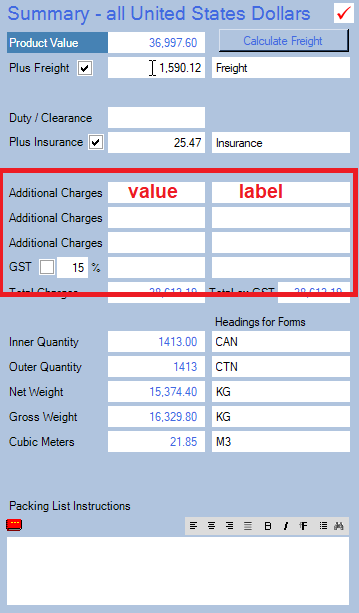
When Prodoc opens and you’re back within a shipment, you’ll find a new, minimised item on the products screen, and the Details Screen Additional Charges will have changed as below:

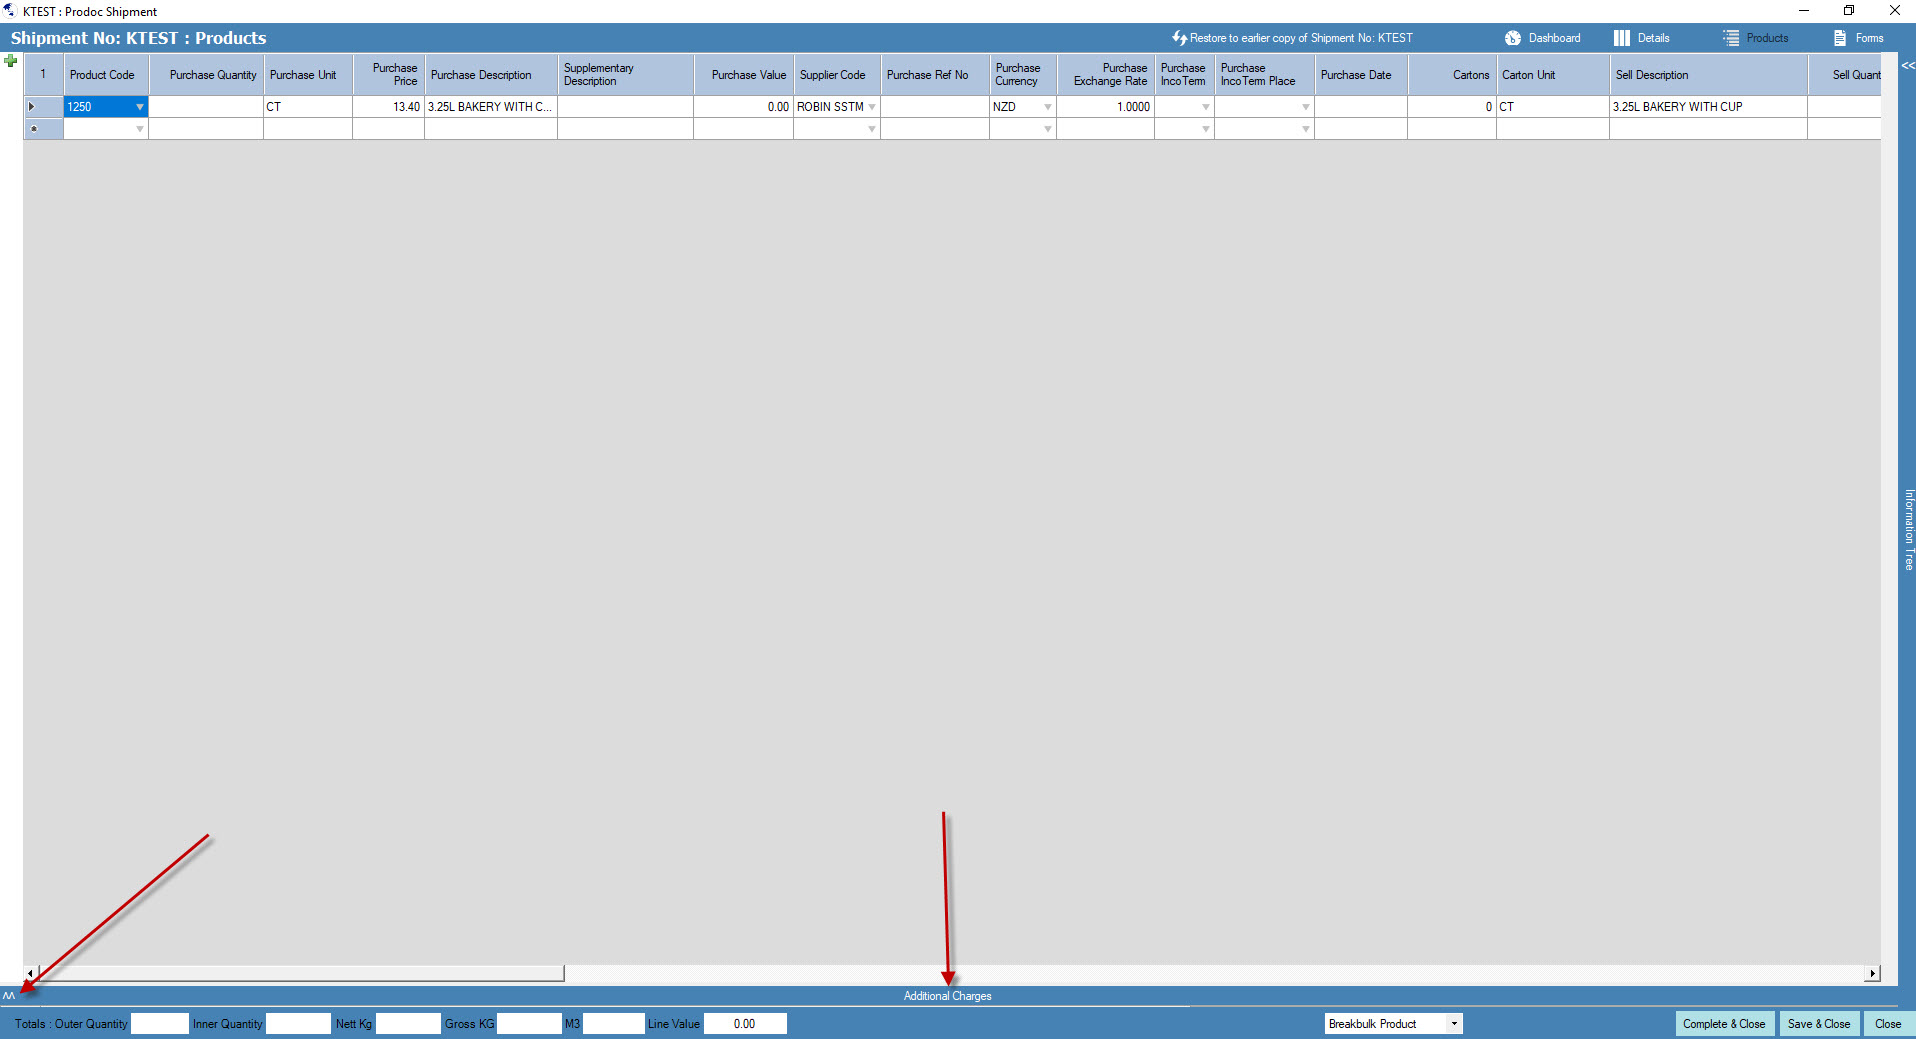
Click the two arrows on the left side to expand this window (you can increase the size by dragging from the bottom of the product box):
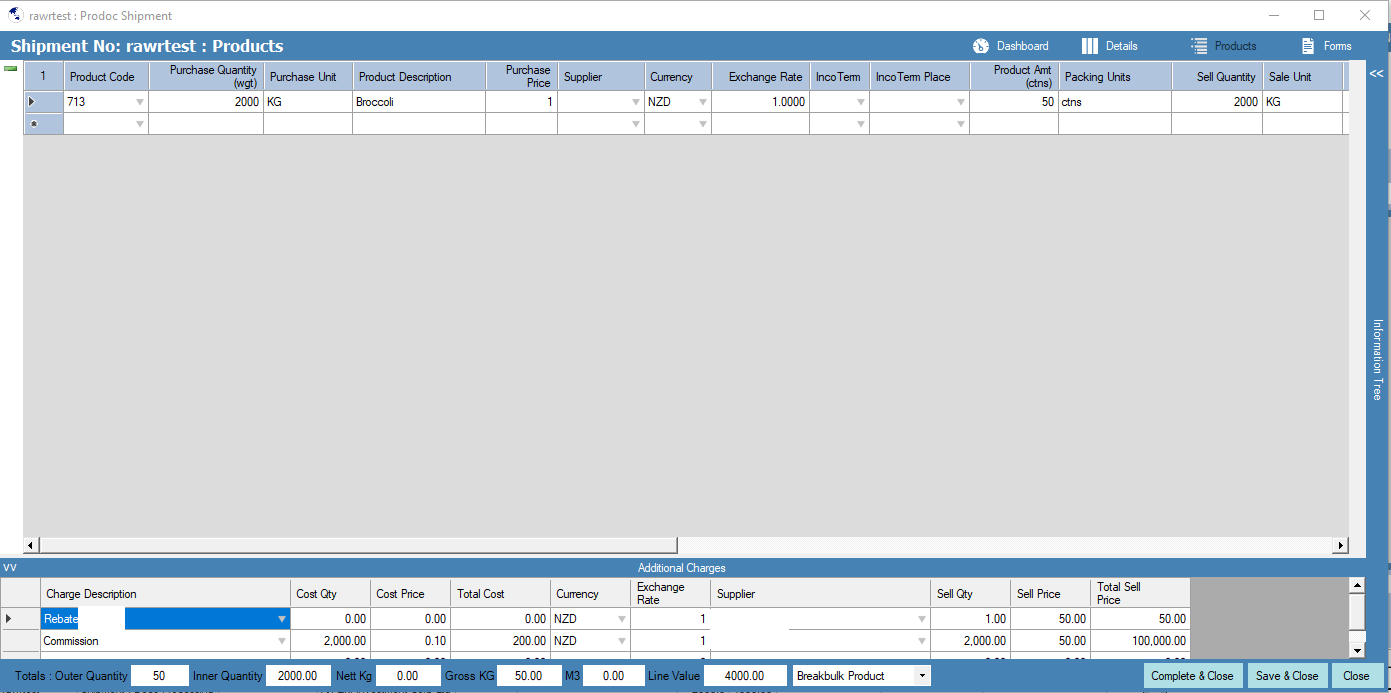
From here it should be relatively straight forward with each box corresponding with the initial new box:
The Additional Charges tool can be invaluable in the right environment and it’s recommended that you have a play, to activate Method B, simply add a charge and restart Prodoc and the reverse to deactivate it.
If you require form modifications to display these charges, please get in contact however these come at the regular charges for form changes.
There’s also nothing to stop you using this experimentally in ways never before implemented, if you come up with something you want to try, there’s no reason why won’t be able to assist and customise it to your needs.